Trying out Aurora HDR 2017

In addition to trying out a pre-production version of Luminar, I’ve also been looking at Macphun’s new version of their HDR software, Aurora HDR. While I’m not a huge HDR user I do like to dabble now and again. In the past I’ve used Photomatix as well as Lightroom’s built in HDR feature, so when I was asked if I would be interested in reviewing it, I was keen to try it out.
Aurora HDR is an interesting take on HDR editing applications. While it does the obvious HDR merging and tone mapping, it has a good few other features, that are very useful. It seems obvious that it was made by talking to people who actually use HDR regularly. One such feature is the ability to add additional layers, complete with layer masks. These layers can be additional adjustments which you can mask off with either a brush, a gradient or a luminance mask, or you can layer over one of the bracketed original images. This is really useful, and it’s something that you will often do in Photoshop when working on a HDR image to fix problems, or even just to dial it back a bit.
The software works well with Lightroom too. There are a couple of ways to send your images from Lightroom to Aurora HDR 2017. You can send RAW files, or you can send Tiffs that include any adjustments that you’ve made already baked into them. The latter option is useful if you’re shooting with a wide angle lens for example, and you want to correct for distortion in Lightroom first. Unfortunately there’s no proper lens correction in Aurora itself, but you can pre-process the images in Lightroom first. Alternatively you can send RAW files over, and this it open them with their full extended range intact. Depending on how you shpt the images, this may give you a grater range. You can also open single images and use the software’s engine to extract as much of the dynamic range as possible out of a RAW file.
I went out and deliberately shot some bracketed exposures to try it out. I shot using 5 bracketed images, hand held, on my D700. For testing purposes, I tried sending the files from Lightroom, both as RAW and as Tiffs, correcting for distortion in Lightroom first.

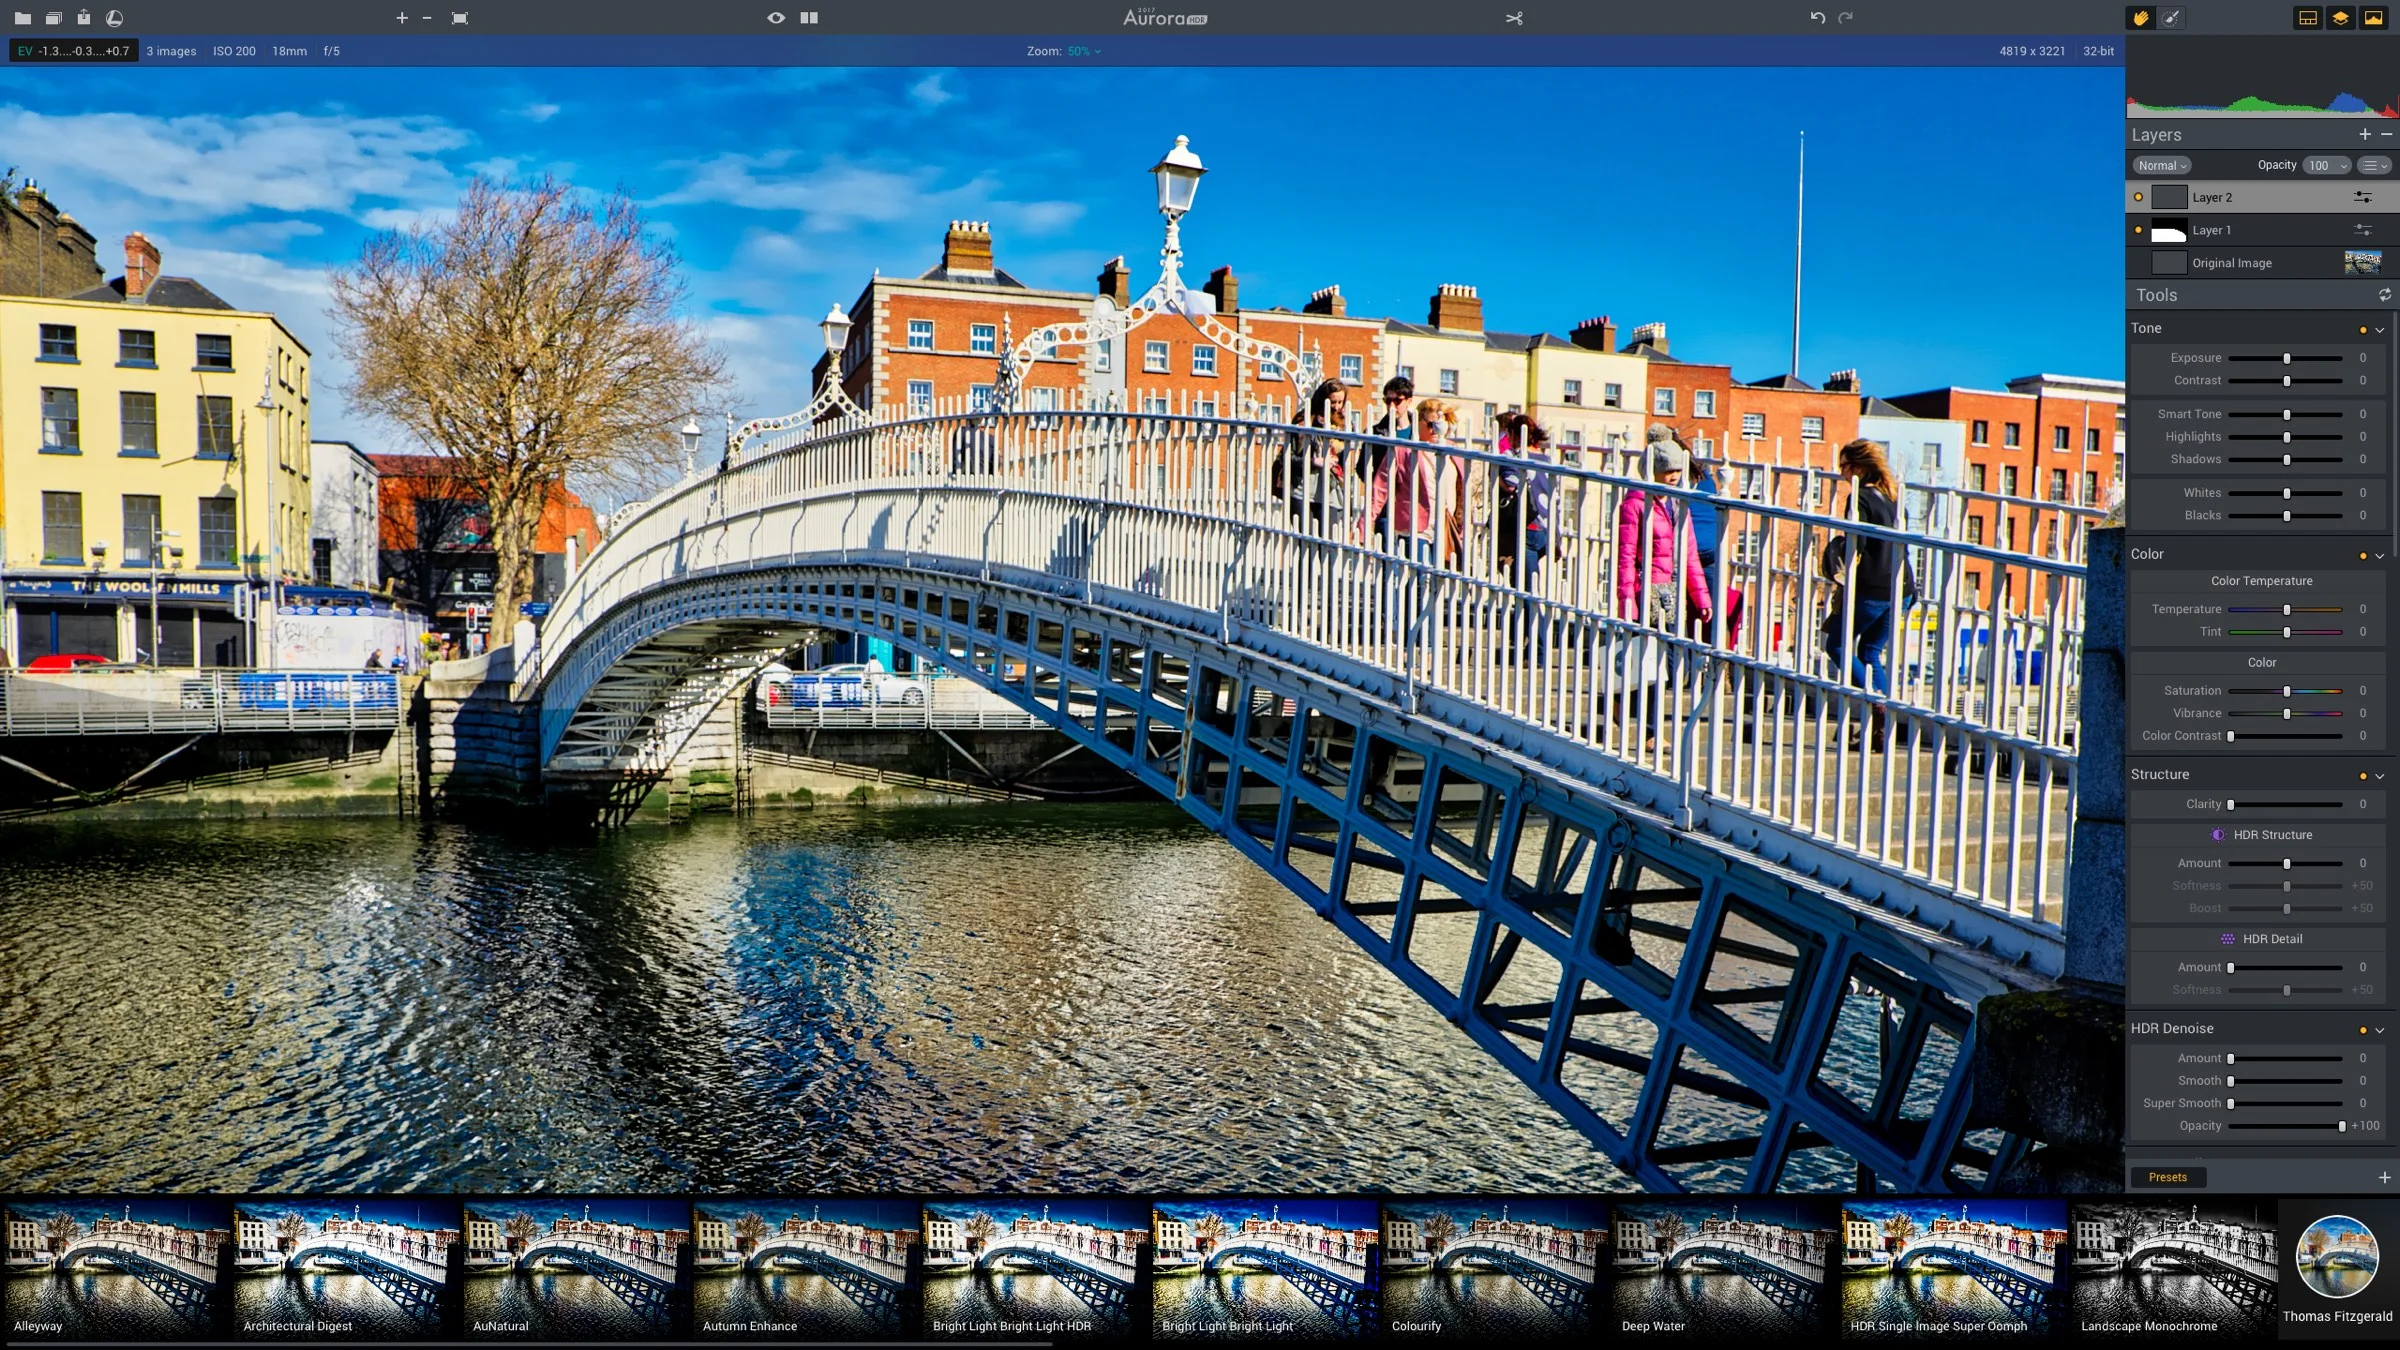
Merging Bracketed Exposures in Aurora HDR 2017
There are certainly a wide range of looks that you can get from the software, and it’s very easy to work with. You can go for the more natural looking HDR or the more typical, artistic (over-processed) look. In fact there is a slider just to control that. I often found it a challenge controlling this aspect in Photomatix, but here it’s all very simple. I found that it has a tendency to create very strong punchy colours, and a few of my first attempts were a bit garish. But that was down to me discovering the software than anything wrong with the software itself.
There are lots of presets included, and it’s easy to make your own. There’s a lot of room for experimentation with the software, and that’s one of the great aspects of it. In fact if I was to say what the single best feature is, it’s the fact that it’s such fun to use. I know that sounds kind of trite, but it really is. I spent a couple of hours yesterday just playing around with it (and getting very little actual work done!)
There are a few negatives. It really needs some kind of distortion correction for working with RAW files. Also, I have mixed feelings about the quality of the raw engine, which I believe uses Apple’s raw conversion. The quality of my D700 files weren’t brilliant from it, but images from newer cameras, such as the X-Pro 2 were much better. I believe that some of this may be to do with the lack of control over the RAW process, and the lack of distortion correction. However, as I said, you can bypass this by sending tiffs from Lightroom instead, and it does seem to be camera dependent.
HDR from a single RAW file (Fuji X-Pro 2)
The feature to add additional layers is a god send, especially being able to layer the bracketed files back on top. When you do this, they’re already aligned, making it really easy to fix potential problems, such as ghosting errors and so on. In one of my tests, the sky had gone a little crazy, and there was a lot of bleeding from dark areas, so I just layered the original version back on top, adjusted it till it matched, and then painted a mask so it was just affecting the sky.
Another really useful feature of the layers part of it, is that you can use this in conjunction with the presets, whether the supplied ones or your own, to blend presets. You can add the tone mapped HDR file as a new layer, and apply a new preset to this, then use the layer controls to blend it with the layer below. This includes masking, opacity and blend modes.
Below are some examples of Images that I’ve created playing around with it. They’re not brilliant by any means, but I’ve only played around wth it for a little bit, so I will undoubtedly get better at it and the images will improve. Most are from a D700 although there are a few Sony A6000 shots in there too. I will try and do a more thorough run-through in a future post. If you’re interested in the software, it’s available now, and there’s a trial version available too.
I’ve signed up as an affiliate, so if you do want to buy it, going through the link above or in the sidebar would be a great help!


Help Support the Blog
All of the work I do here, and the information on this blog is done entirely free of charge and takes up quite a bit of work. I want to spend more and more time on this blog, and offer more and more of this kind of information, tips and so on, so If you like what I'm doing here and want to show support, then you can do so by buying something from my Digital Download Store. I have Lightroom Presets, and e-books all available for download.
If you're a Fuji X-Trans shooter and Lightroom user, check out my guide to post processing X-Trans files in Lightroom. I also have a guides for processing X-Trans files in Capture One and Iridient Developer.
For Sony Alpha shooters I have a new guide with tips on how to get the best from processing your A6000 Images in Lightroom.
If you want to get regular updates, and notices of occasional special offers, and discounts from my store, then please sign up for the Newsletter.