Using Iridient Developer with Lightroom for Fuji X-Trans Files
In my continual quest to get the best from my little Fuji XE-1, I’ve been trying lots of different options. I recently posted some sharpening settings for Lightroom that I felt improved the quality of Lightroom’s weird processing of the fuji raw files. I had mentioned in that post that I was also trying our Iridient Developer, which lots of people have been raving about recently for its ability to get good results with files from Fuji’s x series cameras. I was expecting to be underwhelmed, but I wasn’t. In fact I was blown away by the quality.
First of all, you may be wondering what advantages Iridient Developer gives over using Lightroom. Actually, depending on your image you may not notice that much of a difference. However, despite an earlier fix which addressed the demosiacing of X-Trans files, Lightroom still has problems with fine textural detail. It’s especially noticeable in areas of trees or other foliage, or other repetitive textures. The problem is that Lightroom seems to generates false detail around high contrast edges. It looks like an additional line around objects, almost like an embossing or an outlining effect. When this occurs repetitively on fine textures, you end up with mushy detail. It seems to be exacerbated by Lightroom’s sharpening algorithms, and that’s why I spent quite a bit of time trying to come up with those sharpening settings to try and mitigate the problem. However, no matter what you do, you may be able to reduce how noticeable it is, but you can’t get rid of the false detail that Lightroom is creating. Iridient Developer on the other hand (and some other third party developers) doesn’t have this issue. Here’s what I hope is clear example of this false detail effect that I’m talking about:
you need to click on the image to view large to see what I’m talking about. The image on the right is Lightroom’s conversion and the one on the left is from Iridient Developer.
Here’s a crop up of the vent area. The first is Lightroom.
You can see the outlining effectI’m talking about around the edges of the vents on the refrigeration unit. Here’s the same section from Iridient Developer. In this case it’s a perfectly natural looking and there’s no sign of the false detail that Lightroom is generating.
It’s hard to convey this with a small crop on a website, but when you’re looking at your image on a large monitor like I am, it’s pretty obvious. Some people will inevitably argue that you can only see this while pixel peeping, but I don’t think that this strictly true. You may only see what is causing the problem when zoomed to 1:1 but all these artefacts add up, and even if you can’ make out exactly what it is, when I view these files on my 27” monitor, zoomed out (not at 1:1) I can still see that something isn’t quite right with the Lightroom version. Of course, you don’t have to take my word for it, and if you’re perfectly happy with your Lightroom conversions, then that’s great. On the other hand, if you have an issue with your X-Trans files and Lightroom, you don’t need me pointing it out because it’s probably already frustrating you.
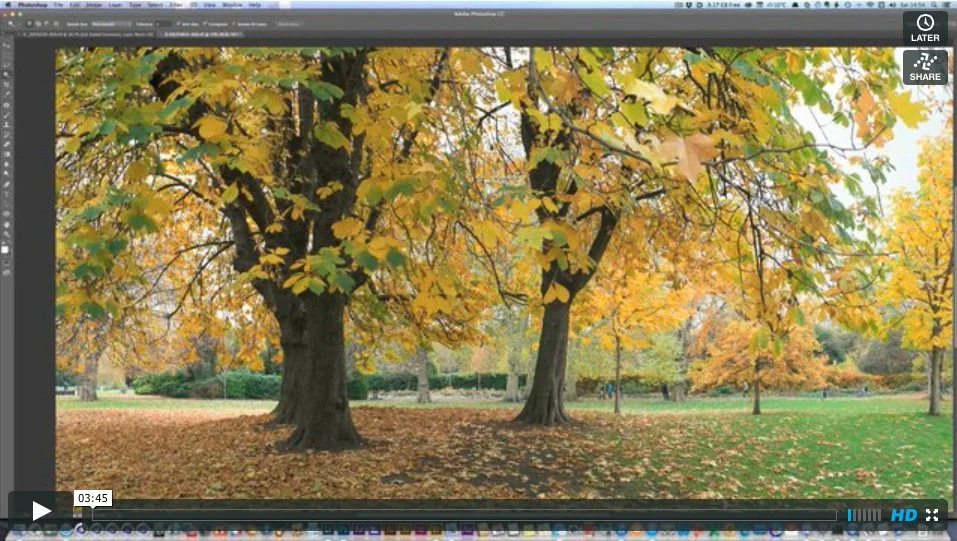
Here’s another example. this time there is some foliage, and you can see the effect of this false detail on areas of repetitive patterns. The result looks like the leaves in the lightroom version were painted on. Also note the bush and the grass area below the trees, and how smudged this detail is in the Lightroom version. (Again, click the image to view at the right size)
Anyway, moving on, if you want to use Iridient Developer, or any other third party software, but still use Lightroom as your main hub, then there are a few ways you can go about it. I’ve come up with two workflows for making it as seamless as possible.
1. Using The “Open Directly” Plug in
If you only want to send a couple of your images to Iridient Developer to edit then I think this is the easiest way to do it. If you set up an external editor, it only sends a tiff or a photoshop file to the software of your choice. It doesn’t send the raw file. Luckily there’s a great little plug in that allows you to open your Raw files in another raw converter. It’s called “Open Directly” and it’s created by John Beardsworth. With this you can send the raw files of your selected images directly to a third party converter, in this case Iridient Developer
There’s one issue with it though. It doesn’t re-link files after you’ve processed them. You need to do this manually. Luckily, in lightroom that’s pretty easy. Render the processed images back out to the same folder that they came from (it does this by default anyway) Then, in Lightroom, simply select the folder in the Library module, and right click and choose “Synchronise Folder…” This will pop open a dialog box asking you if you want t import the new images.
By default Lightroom will jump to the “Current Import” section of the Library, which can be a pain if you’re working on a whole set of images. However, you can disable this behaviour in the preferences.
Another thing to watch out for is that if you had a develop preset set to be added on import the last time you imported images, it will be applied when you do this. You want to watch that its not adding sharpening, because your images will already be sharpened, so you don’t want it overdone.
2. For Processing A Whole Shoot
If you want to process a whole shoot, I have another workflow which I think is a bit easier:
The first thing to do is to import your images into Lightroom from your memory card. You’re probably not going to use them all, so there is no point in externally processing all of them, so go through the shoot and pick which ones you want to work with, and then mark them with 5 stars.
Once you’ve made your selection, select all your images, and from the Metadata menu choose “Save Metadata to Files”. This will write out your star ratings to the directory with your files in it as xml sidecar files.
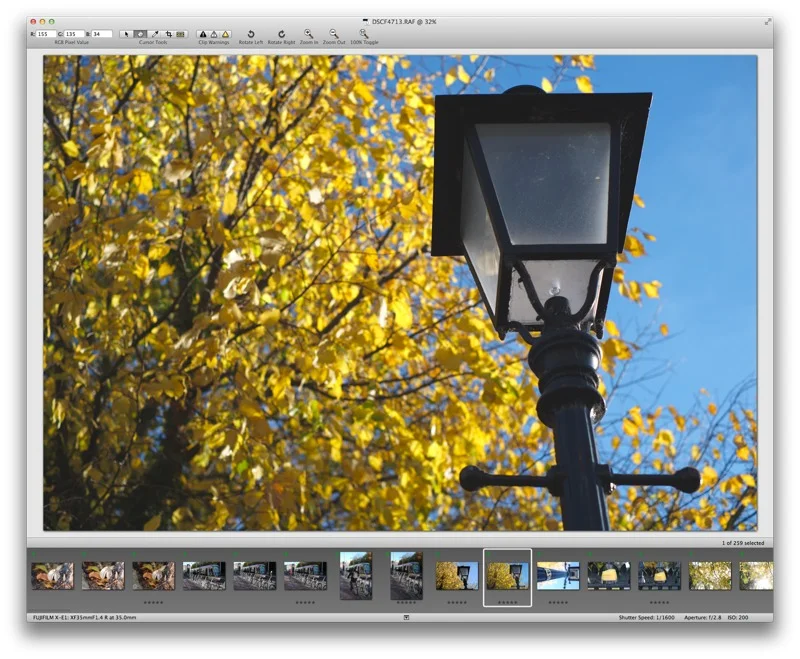
Now switch over to Iridient Developer and choose “open” from the file menu. Select the folder where your raw files are, and they will open in the film strip at the bottom of the interface. Now, all your starred images will appear starred here too, so you can go through them and just work on the ones you’ve previously starred. Once you’ve finished, Iridient Developer has a cool function which will let you select files based on their star rating, so you can select all your starred images, and then batch process these.
Once your images are finished processing, you can add them back to your Lightroom library by using the “Synchronise Folder” method mentioned above.
When you have your images back in Lightroom you can do some further tweaking. I often add some vignetting and some other tweaks, or apply one of the VSCO film presets to my images.
I’ll have some more details about what it’s like to actually process files in Iridient Developer in an upcoming post and I’ll try and do a video showing you the process. As I said earlier, you may be perfectly happy with Lightroom’s processing, and don’t need the additional workflow. However, I really do think that by using something like Iridient Developer with Fuji files, you will be amazed at the difference in the detail it brings out.
For now, here’s a few more examples of files,which were initially processed in ID, then further enhanced in Lightroom using some of my own techniques, and with some VSCO Film thrown in for good measure.
Please Help Support the Blog
I am a fine art Photographer and do not shoot commercial projects. I do my best to keep this site regularly updated with lots of tips, reviews, news and photography advice, all for free. If you like what you read here and want more, then sign up for our newsletter to get regular site updates and occasional special offers. You can also follow my photographic exploits on Facebook and Twitter
If you're a Lightroom user check out my original Lightroom Presets