

Create your own Lightroom Plug-ins with Photoshop Droplets

Here’s a handy little tip I discovered recently. You can use Photoshop’s droplets to make Lightroom Plug-ins. Ok, that might be over-selling it slightly, but, by creating an action in Photoshop and then saving it as a droplet, you can then assign that droplet to work like a plug-in in Lightroom. Here’s how I’ve used it…
To start, as part of my on-going quest to get the most out of Fuji X-Trans files, I had been working on a way to clean up the weird edges that Lightroom can give with x-trans files. I ended up with quite a complex photoshop action, which actually works quite well (more on that in a future post) and also adds some sharpening and a few other things. I don’t know what made me think of trying it as a droplet, but I’m glad I did. Anyway, the process is pretty simple, so here’s how to do it. In this example I’m using another action I created, for sharpening 24mp images:
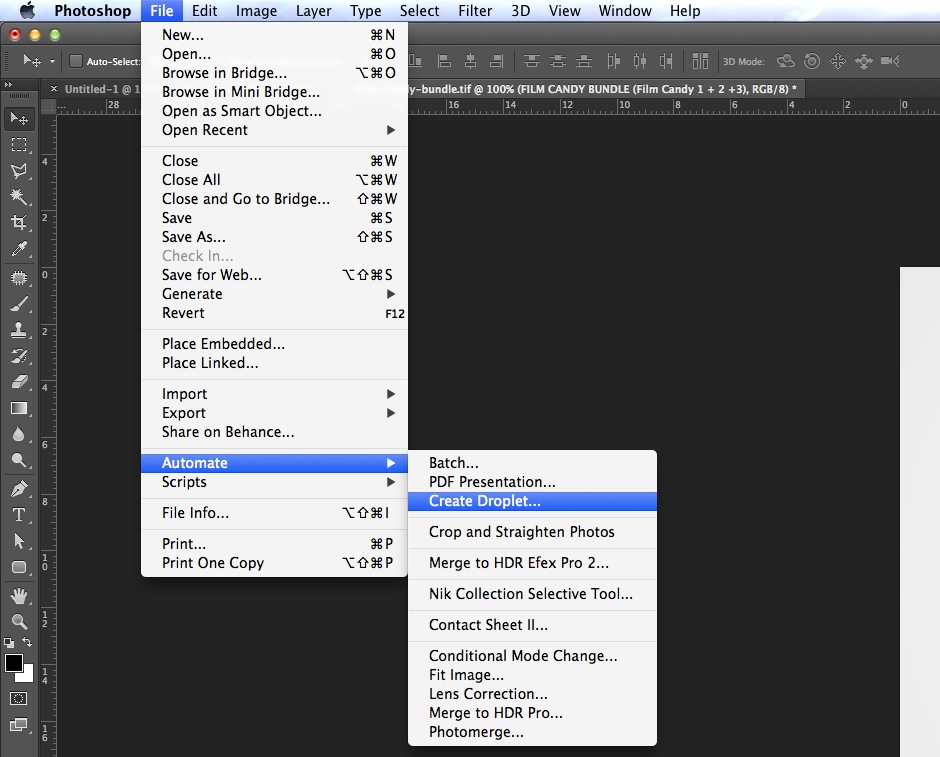
In photoshop, once you have your action made, you can create a droplet by going to the File Menu and Choosing Automate > Create Droplet
This opens the droplet creation dialog. There you set your options and create the droplet, which will be a little application. For this to work, you should set the destination to Save and Close, and make sure to have “Suppress File Open Options Dialogs” and “Suppress Color Profile Warnings” tick-boxes checked. Set the destination for the Droplet with the Choose button and then click ok to create it.

As mentioned earlier, a Photoshop droplet is a little application. However, don’t be mistaken for thinking that it is stand alone, as it isn’t unfortunately, you’ll still need photoshop installed. Once the droplet is saved, switch to Lightroom. Go to the Lightroom Preferences (from the Lightroom menu on a Mac or the Edit menu on a PC) and switch to the External Editing tab.
In the second section of this window, called “Additional External Editor” where it says Application, hit the choose button. From the resulting file dialog select the droplet you just created. Set the other options to your preferences. It’s up to you what file format to use, but it should really be Tiff or PSD. I usually use ProPhotoRGB as colour space and set Bit Depth to 16 bits/component. I generally leave resolution set at the default 240 but this doesn’t really do anything other than set the print size. You’re not actually scaling anything by changing this. I would also make sure the “Stack with Original” checkbox is ticked.
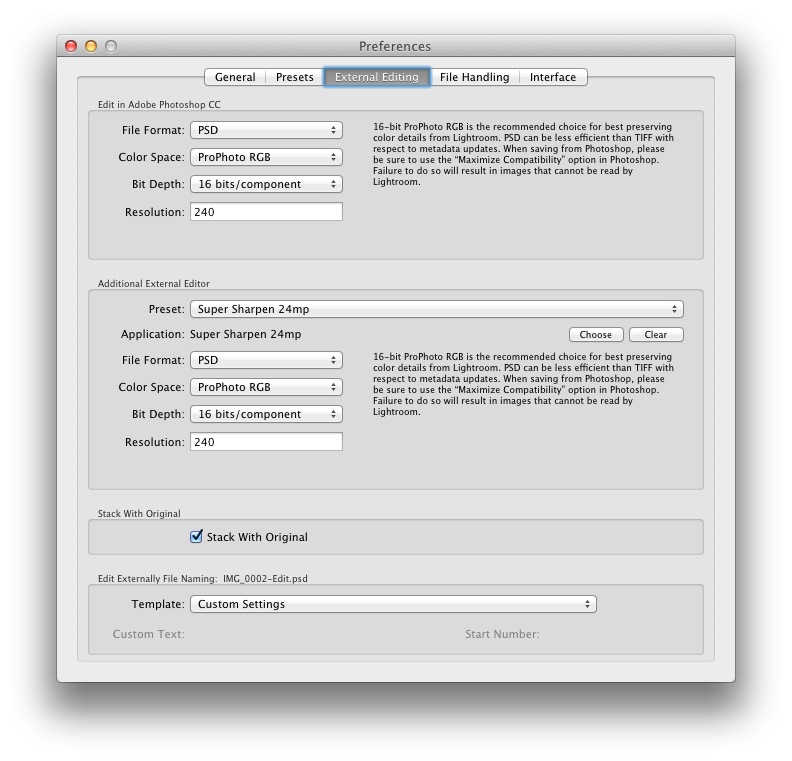
Once you have set all these settings comes the last and most important part. In the Preset pop menu (at the top of the Additional External Editor section) go down to the bottom of this menu and choose “Save Current Settings as new Preset”. Once you’ve done this you can close the preferences dialog.

Now, whenever you’ want to ’re editing an image, you can run your new “plug-in” photoshop action on the image by right clicking and choosing Edit in and selecting the relevant entry. This will send the image to Photoshop and run the action, then save it and send it back to Lightroom. Of course this all happens in the background. What you see in Lightroom, at least with the one’s I’ve tried, is that first a new image is created (the edited copy) and you see this loading, then a few seconds later after the action is run in the background, you’ll see this image re-load with the new edited image. It’s really useful if you are performing tasks that don’t require much input, and saves a few steps of manually sending the image to Lightroom and running the action.
Please Help Support This Site
I am a fine art Photographer and do not shoot commercially. If you like what you read here and want to help support the site, then please consider buying a Print, checking out my new Lightroom Presets


