Fujifilm X-E1 + Photo Ninja = Awesome
As many of my long time readers know I’ve spent quite a bit of time going back and forward between different raw converters trying to get the best out of Fuji’s X-Trans files. While I use Lightroom as my main photo management and digital darkroom application, I’ve found that whet it comes to images from Fuji’s cameras you can get better results from a third party converter. In the past I’ve looked at both Iridient Developer and Photo Ninja, and for a while I preferred Iridient Developer. Lately, I’ve been giving Photo Ninja another workout, and after using it for a while now, and having come up with some new default sharpening settings, I’m absolutely loving the results I’m getting.
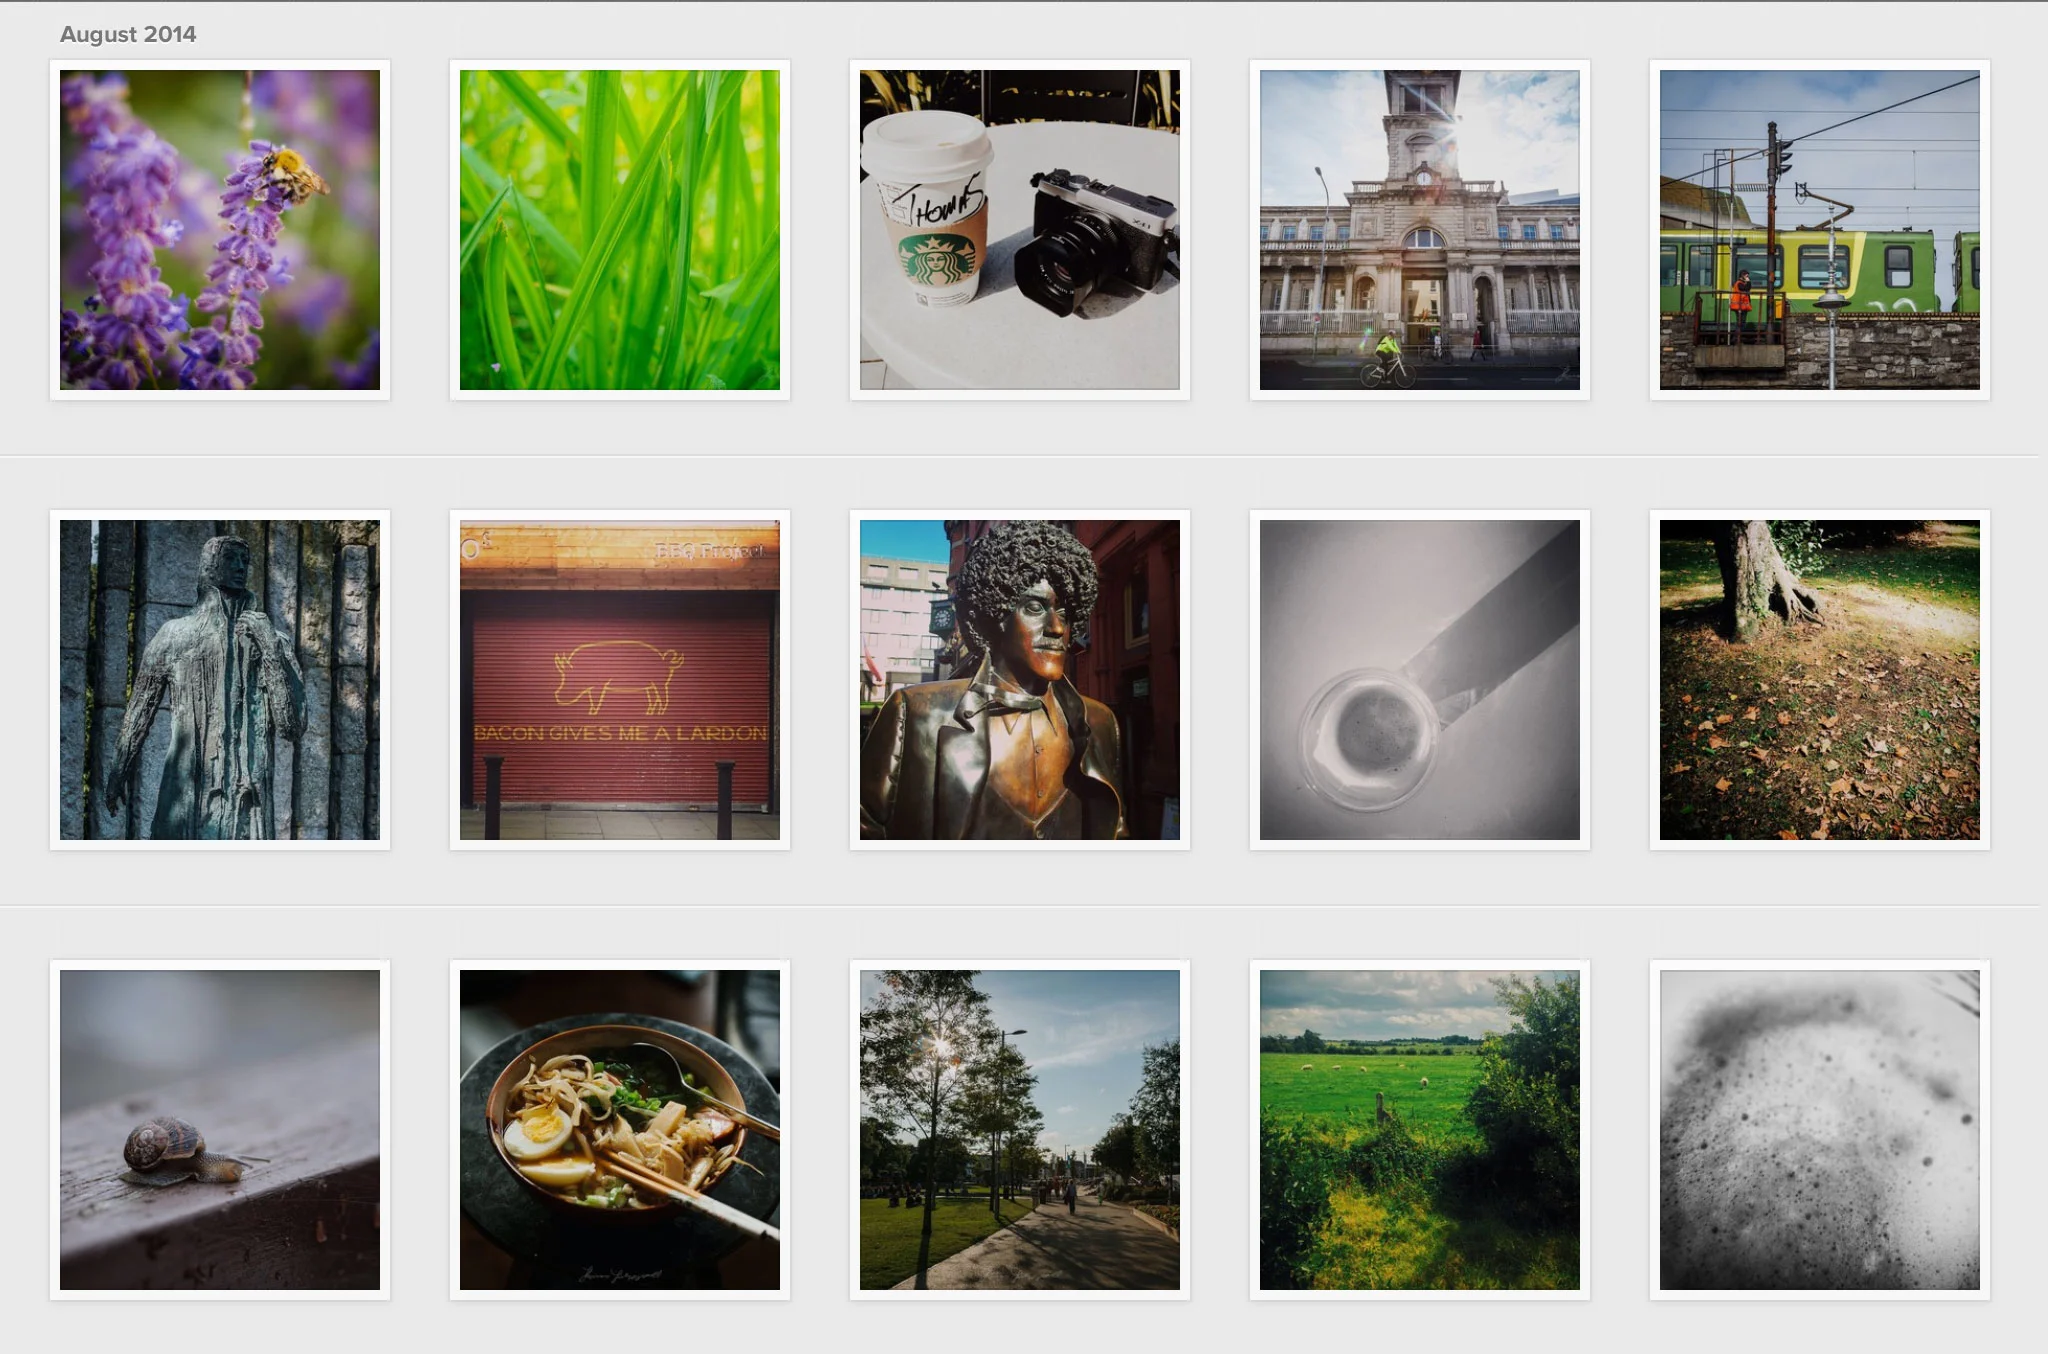
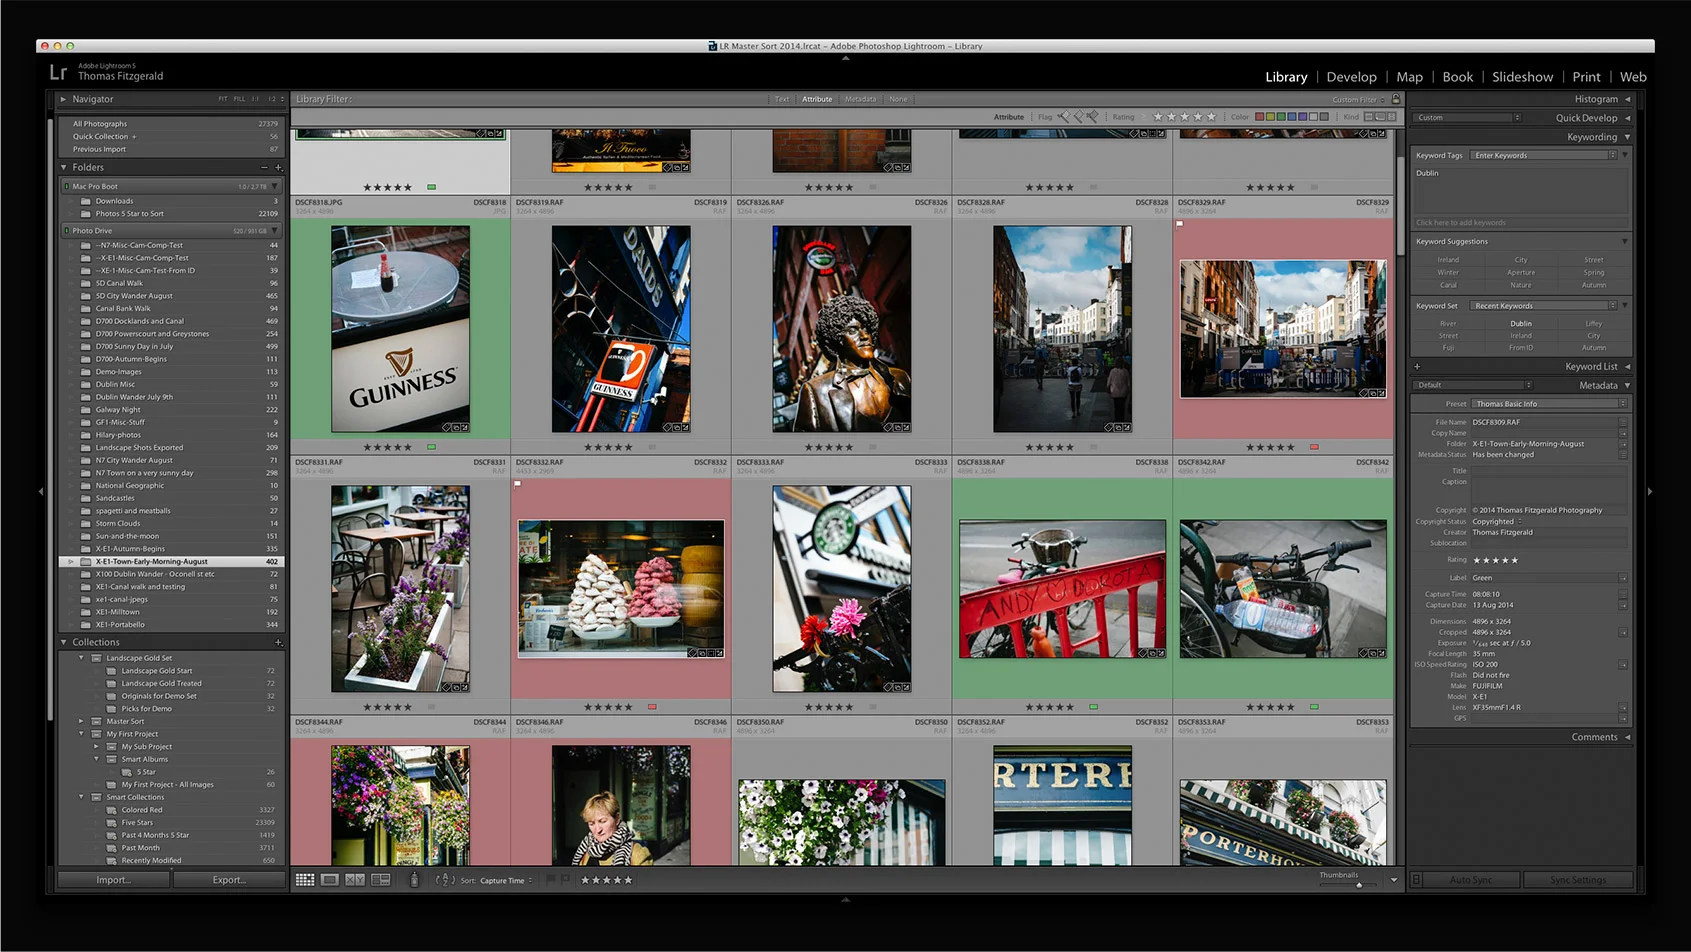
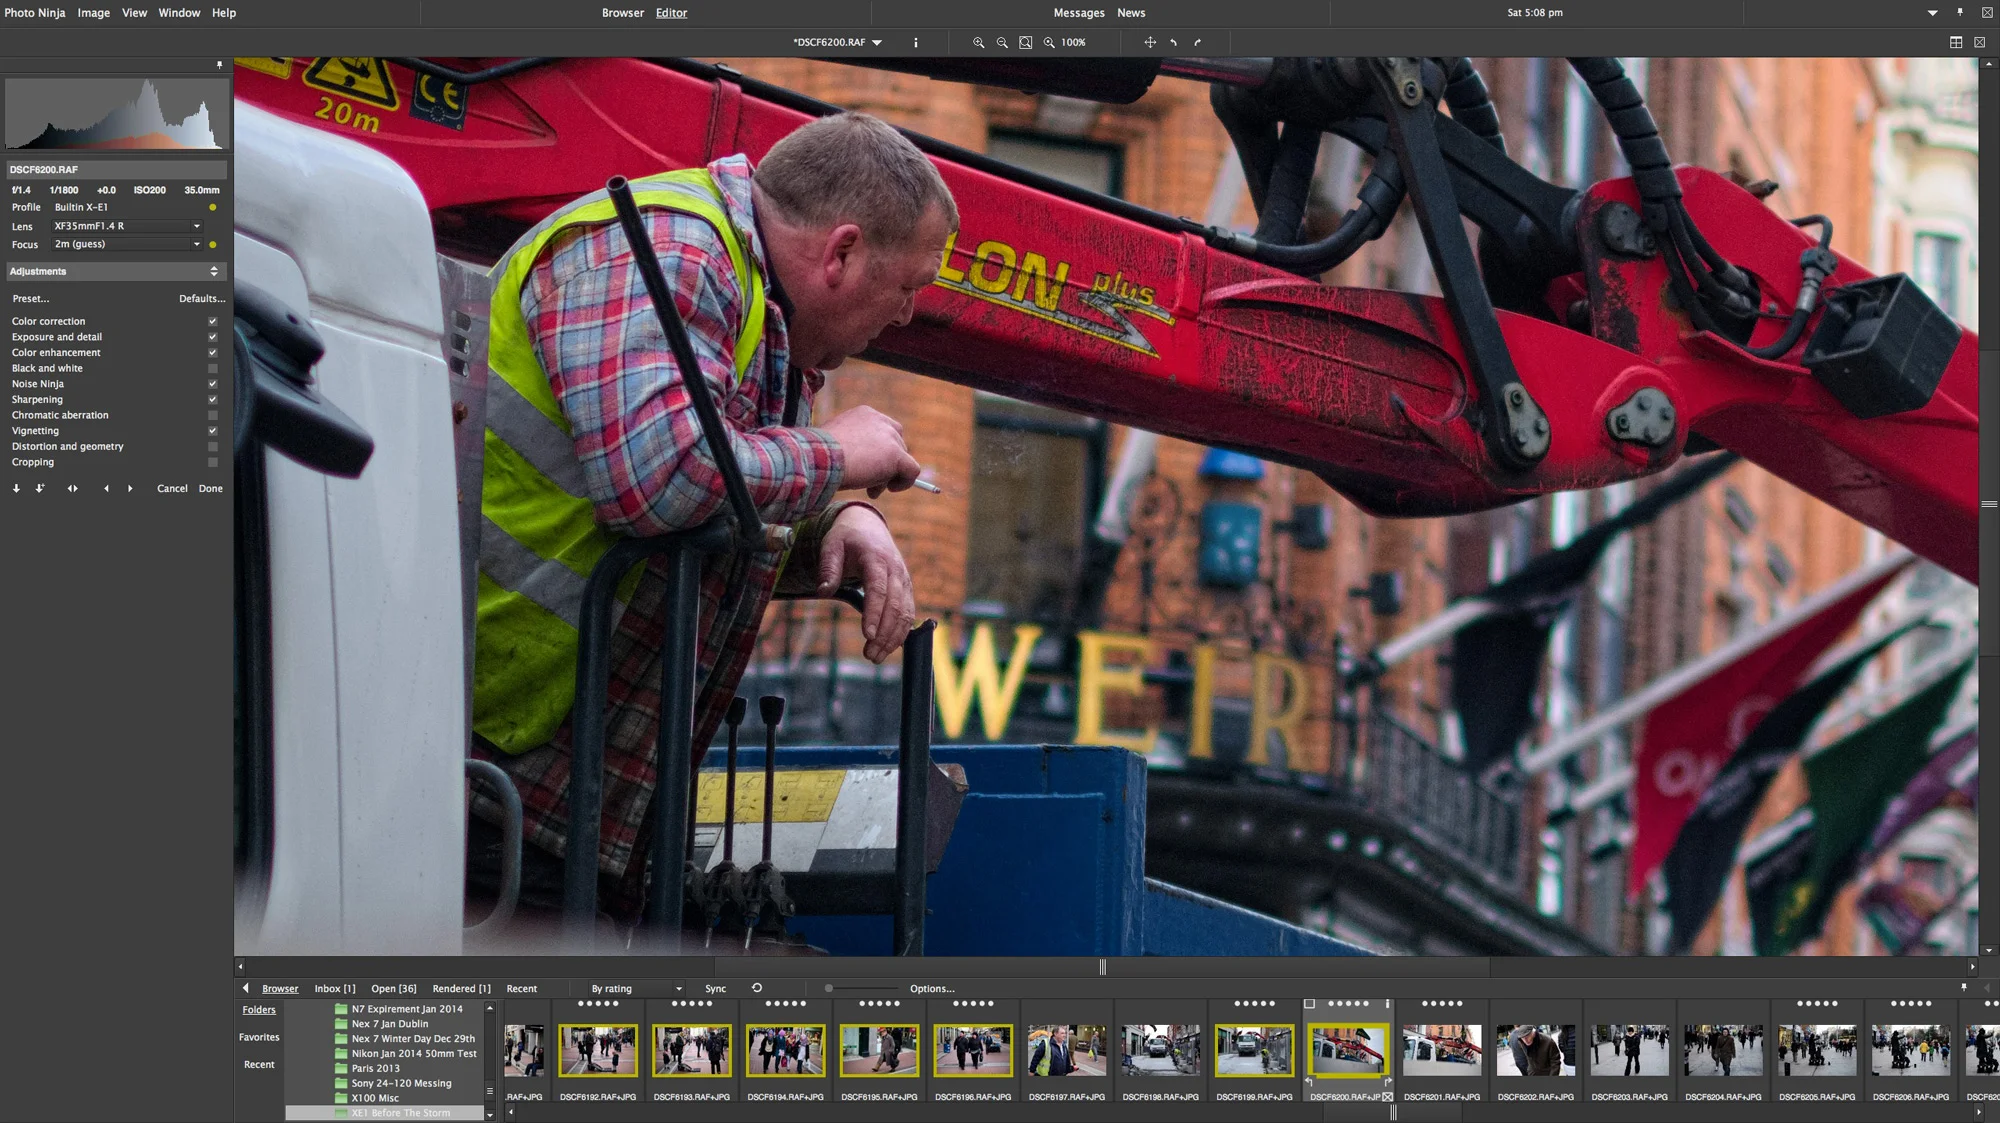
I took my Fuji X-E1 out this morning and was shooting around Dublin city, and I wanted to process the whole shoot with Photo Ninja for a change. I still start by bringing images into Lightroom first, and then rating the ones I want to work on with 5 stars. Once I do that, I’ll save the metadata back to the disk and then open the folder in Photo Ninja. Now I can see the images I’ve selected and I can go through and process them. It’s pretty much the same process as I’ve outlined before when working with Iridient Developer. I’ll post a full tutorial on my workflow for using the two together sometime in the near future, but for now, I was just I just wanted to share some of the settings’s I’m using.
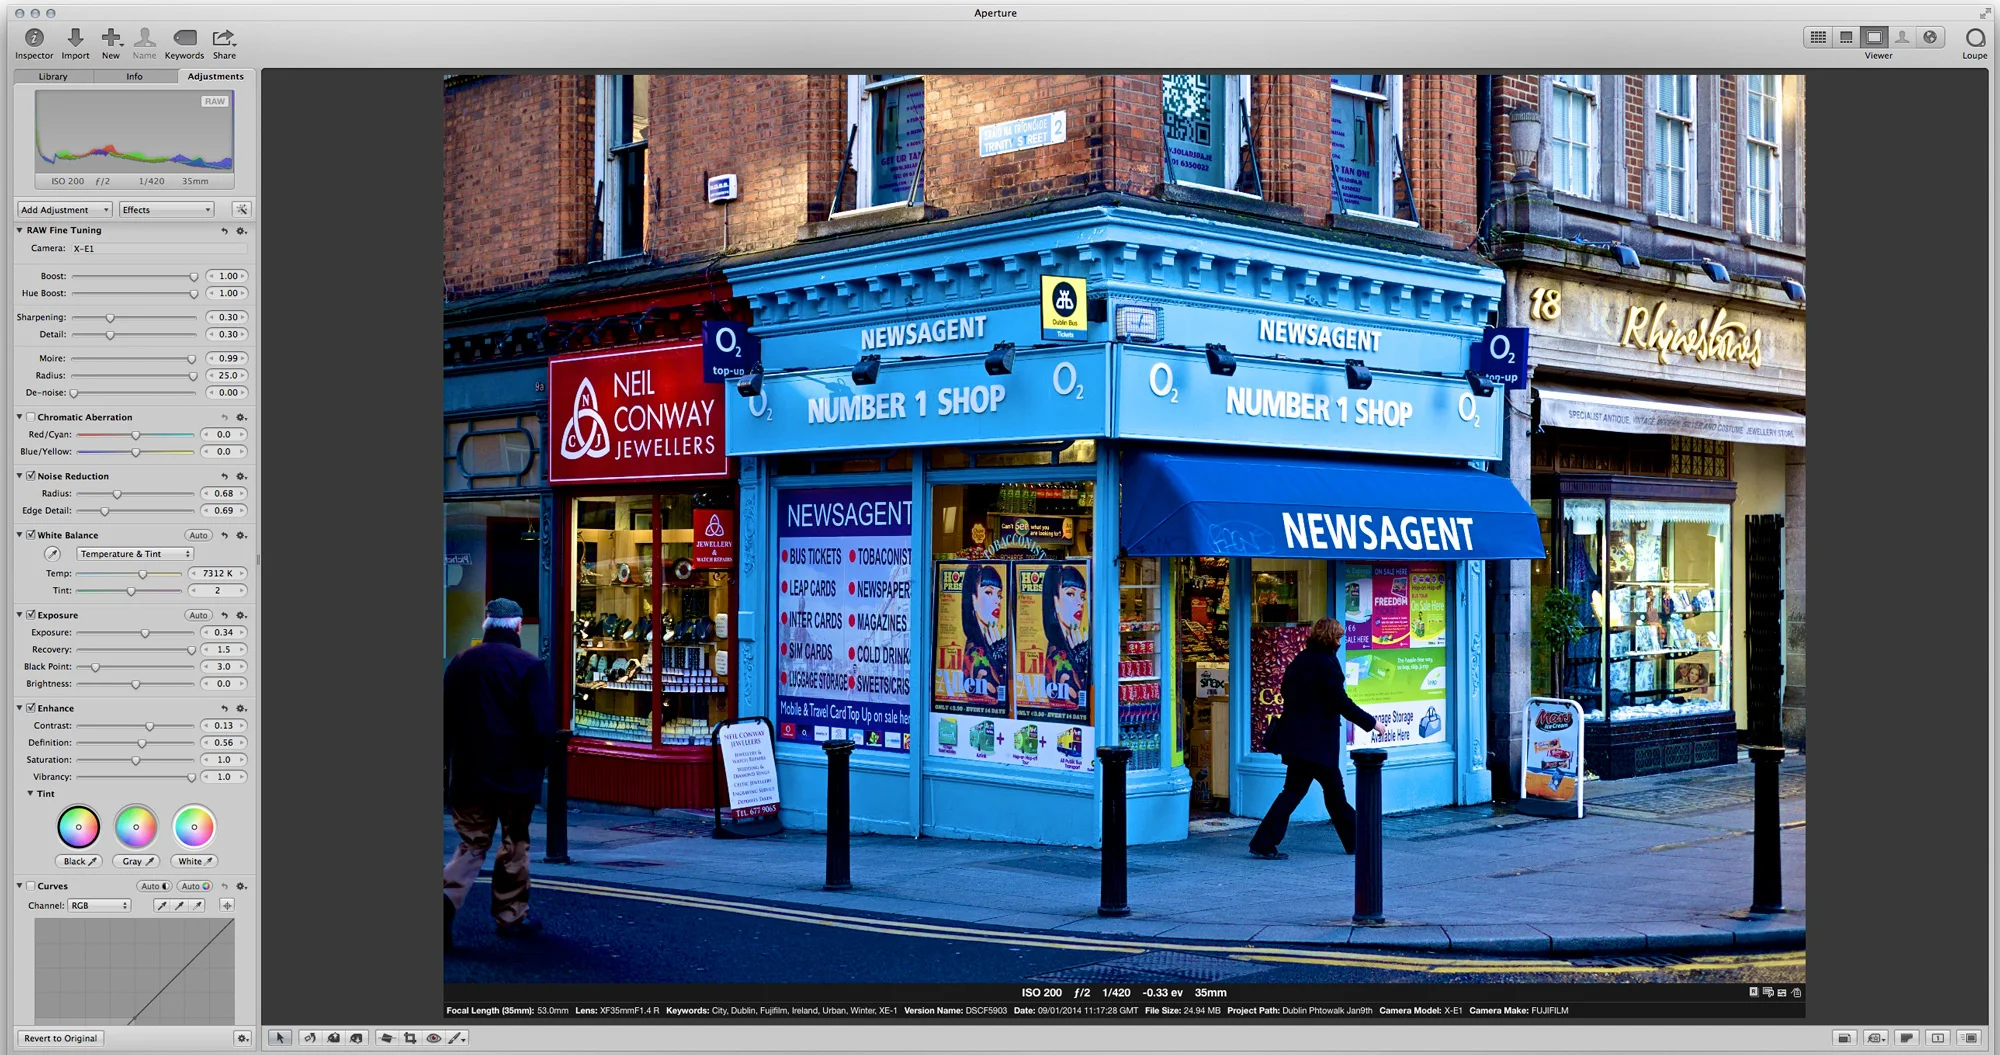
The key to making your images look great is the sharpening settings. In the past when I reviewed Photo Ninja, I liked the results I was getting but I still preferred Iridient Developer’s rendering. Anyway, after experimenting recently, I found a good combination of sharpening settings that I really like, and now, I’m definitely preferring the results from Photo Ninja. Here are the settings I’m using at the moment:
- Sharpening Strength: 40
- Sharpening Radius: 1
- Noise Masking: 100
Obviously, these settings are just my personal preferences, and I’m sure some people will prefer things differently, but this is what works for me, so by all means give it a try.
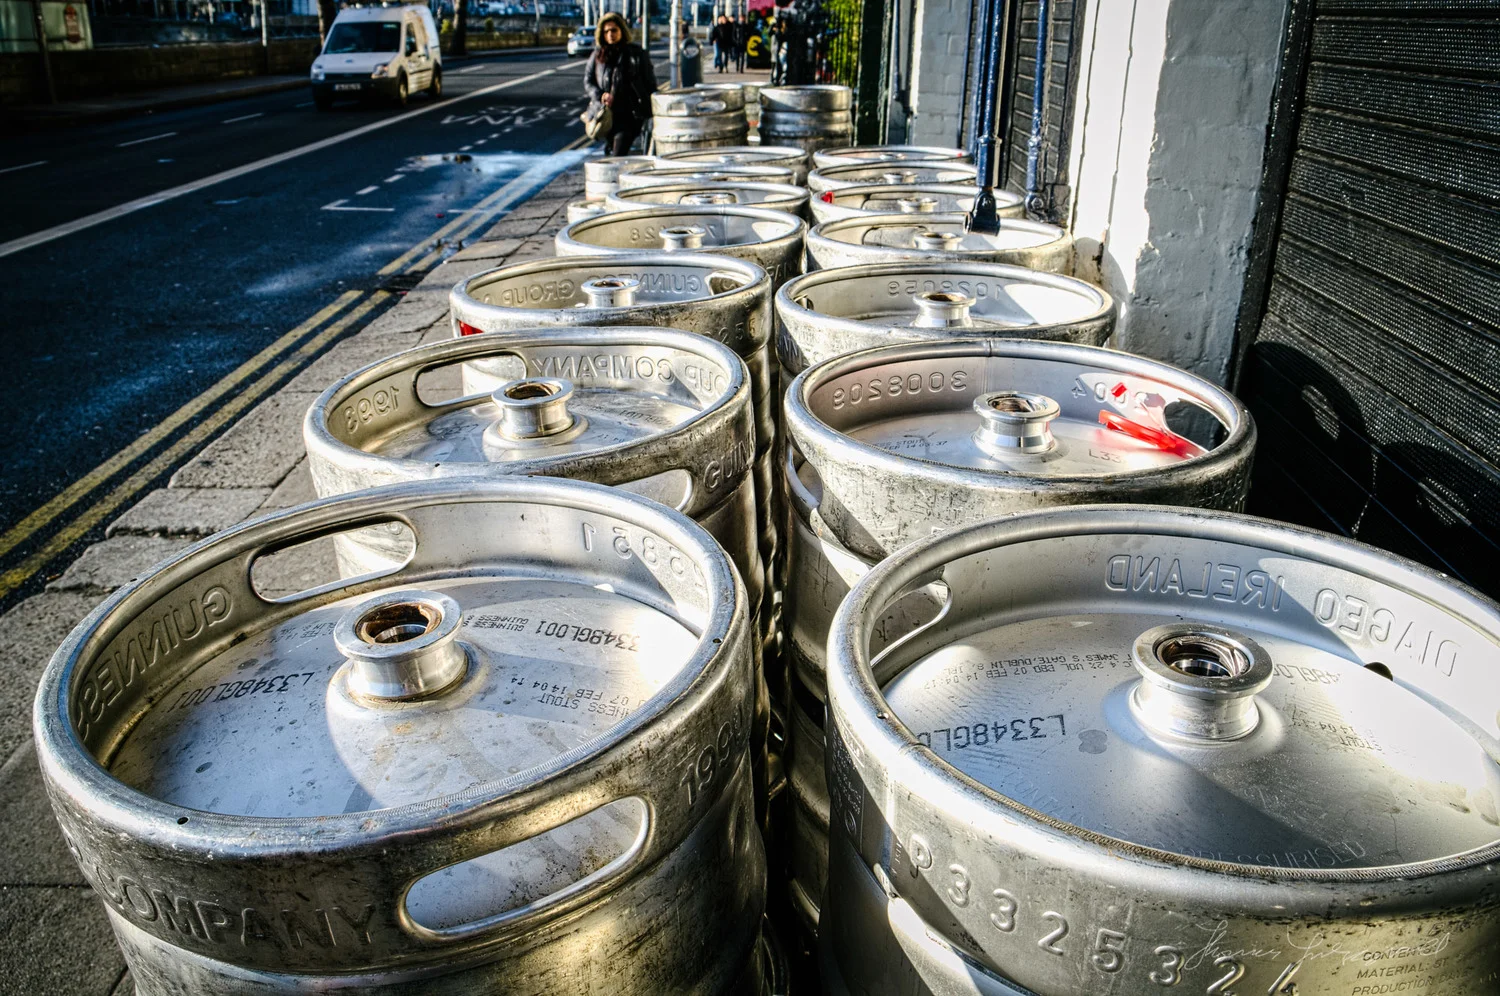
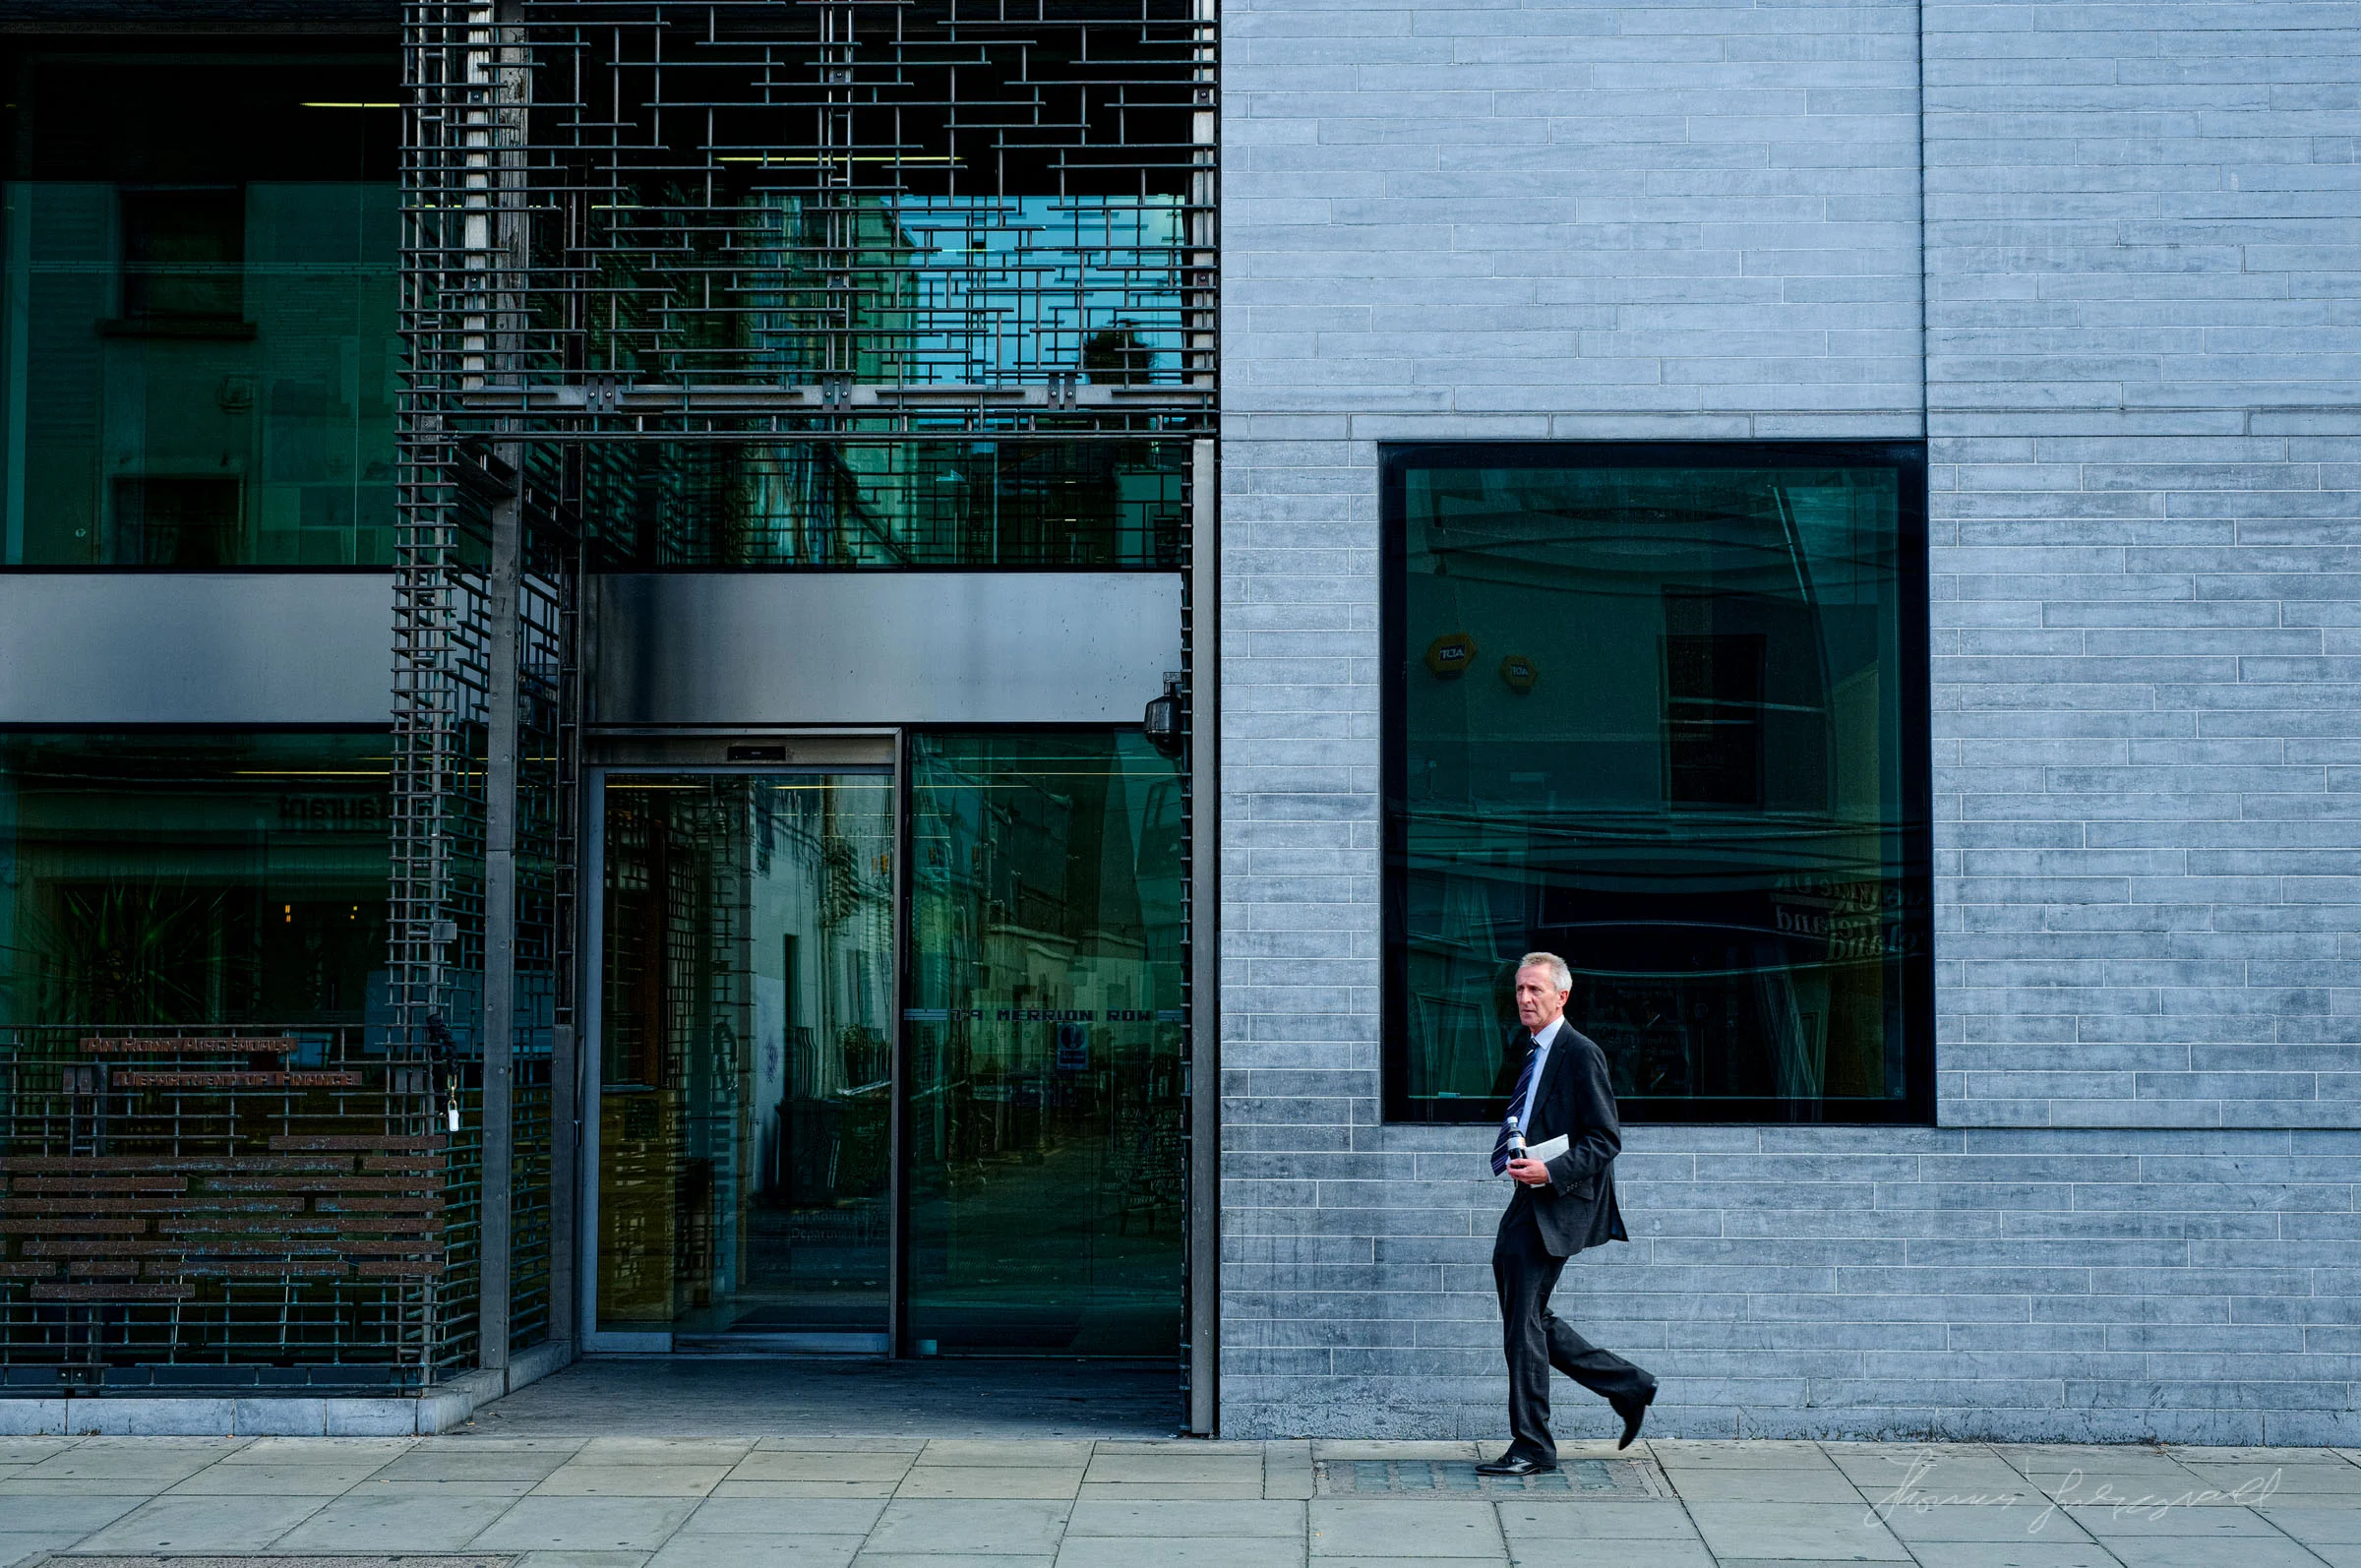
I got the images as close to where I wanted them as possible before rendering them out, and re-importing them back into Lightroom. It’s not just the sharpness and detail that are great from Photo Ninja, but the colour rendition is amazing too. While I’ve tweaked the settings on a few of these images substantially, most only required minor adjustments in Photo Ninja. Once back in Lightroom, I didn’t really need to do anything. On one or two images I added an extra bit of clarity, and fixed some purple fringing, but for the most part these are rendered straight out of Photo Ninja.
I’ll cover this all in depth in more detail in the future, but for now, here’s the results of this morning’s experiments. For more information on Photo Ninja check out Picture Code's website.
A Spider's Web
Wild Flowers
Tree Details
Long Grass
Trees
Grass
Reeds by the canal
Shadows
Car through the reeds
Water falling over the canal lock gates
Dublin Streetlight
Cycling by the park
Watering Cans
Red Details
Pub Walk
Lolly and Cooks
Flowers
Walking with the Paper
Please Help Support the Blog
I am a fine art Photographer and do not shoot commercial projects. I do my best to keep this site regularly updated with lots of tips, reviews, news and photography advice, all for free. If you like what you read here and want more, then sign up for our newsletter to get regular site updates and occasional special offers. You can also follow my photographic exploits on Facebook and Twitter
If you're a Lightroom user check out my original Lightroom Presets