How to import Just Raw (or Just Jpeg) Files into Apple Photos
One of the features of Aperture that I really miss from Photos is the way it handled Raw + Jpeg pairs. If you shoot both, Aperture gave you a great way of managing them. It would allow you to specify which you wanted to import, or it would let you combine them into a RAW + Jpeg pair. It would let you decide, at the time of import, which you wanted as the primary source and you could easily switch between them in the software afterwards. In Photos, while it still combines Raw + Jpeg pairs, there’s no control over the import process, it always sets Jpeg as the primary source and you can only switch between them one at a time in the edit mode.
To get around this, you may be better off just importing one format or the other. While there is no way to do this within the Photos interface, there’s a pretty simple work around. Here’s what to do:
Step 1
Open Photos. You won’t be importing directly, so if you’re memory card is already inserted don’t import the images.
Step 2
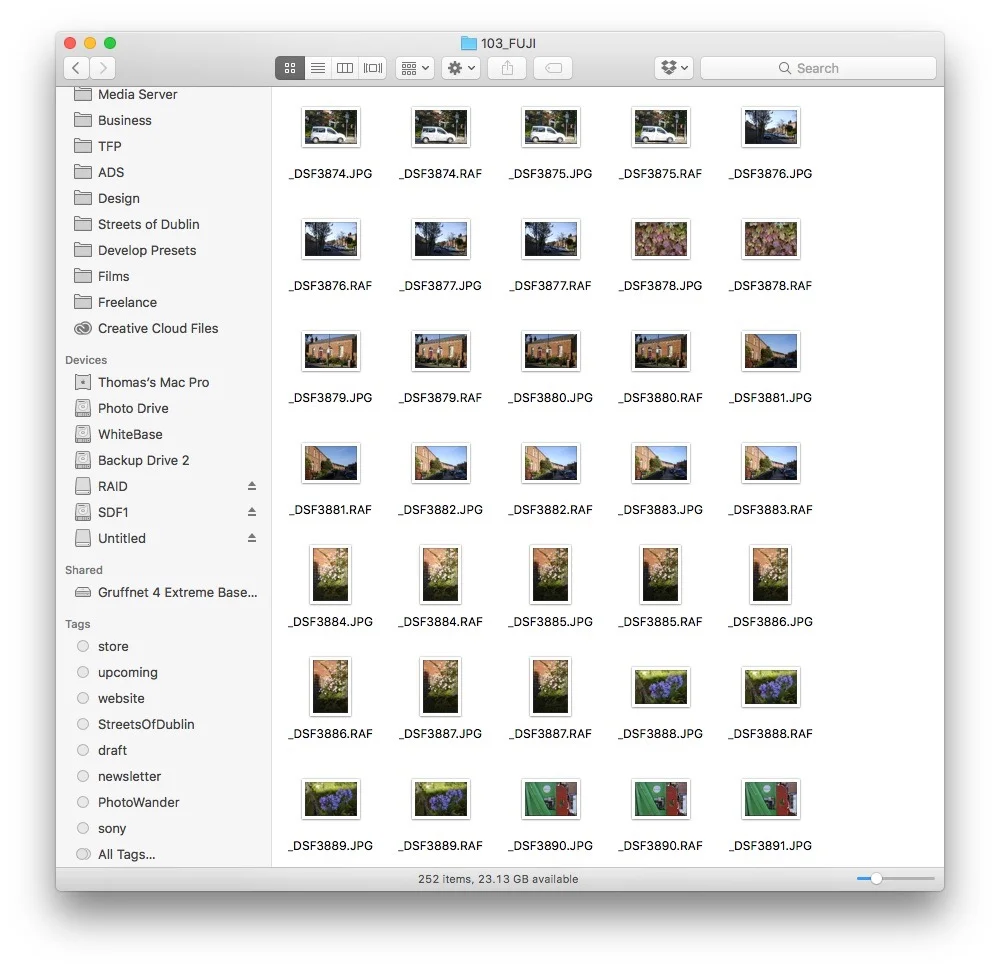
Go to the Finder. Locate your memory card in the side bar. Locate the images within the memory card. They’re usually inside a folder called DCIM. Depending on your camera they may be within another folder within that. Some cameras will create more than one folder. If that’s the case you’ll have to do this procedure for each one.
Step 3
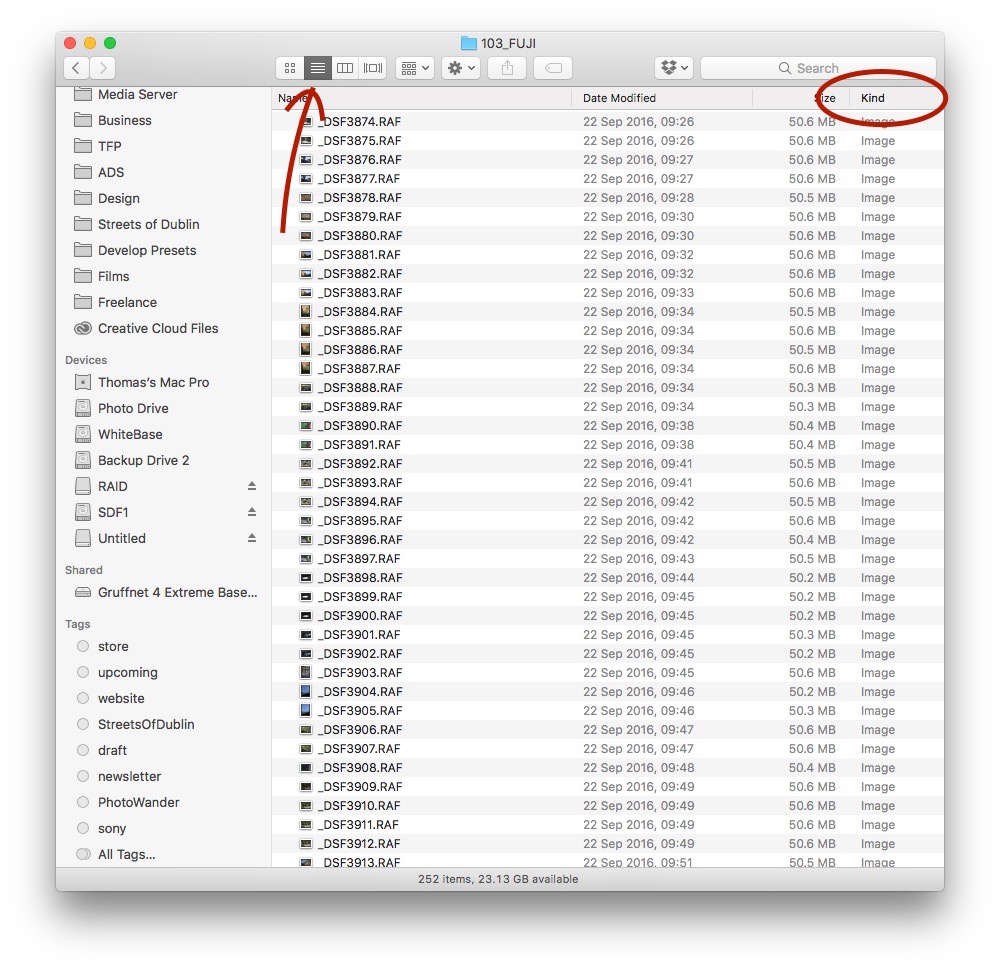
Switch to list view by clicking on the list view icon on the finder toolbar. Now click on the “Kind” heading at the top of the list. This will sort your images by the type of file. This will group all your Raw images together and all your jpeg images together. Clicking the heading again will change the sort order. So if you want RAW at the top or JPEG at the top, clicking on the Kind heading will change the way the list is ordered so one r the other is first. For this example we’re just going to import RAW so make sure RAW is at the top.
Step 4
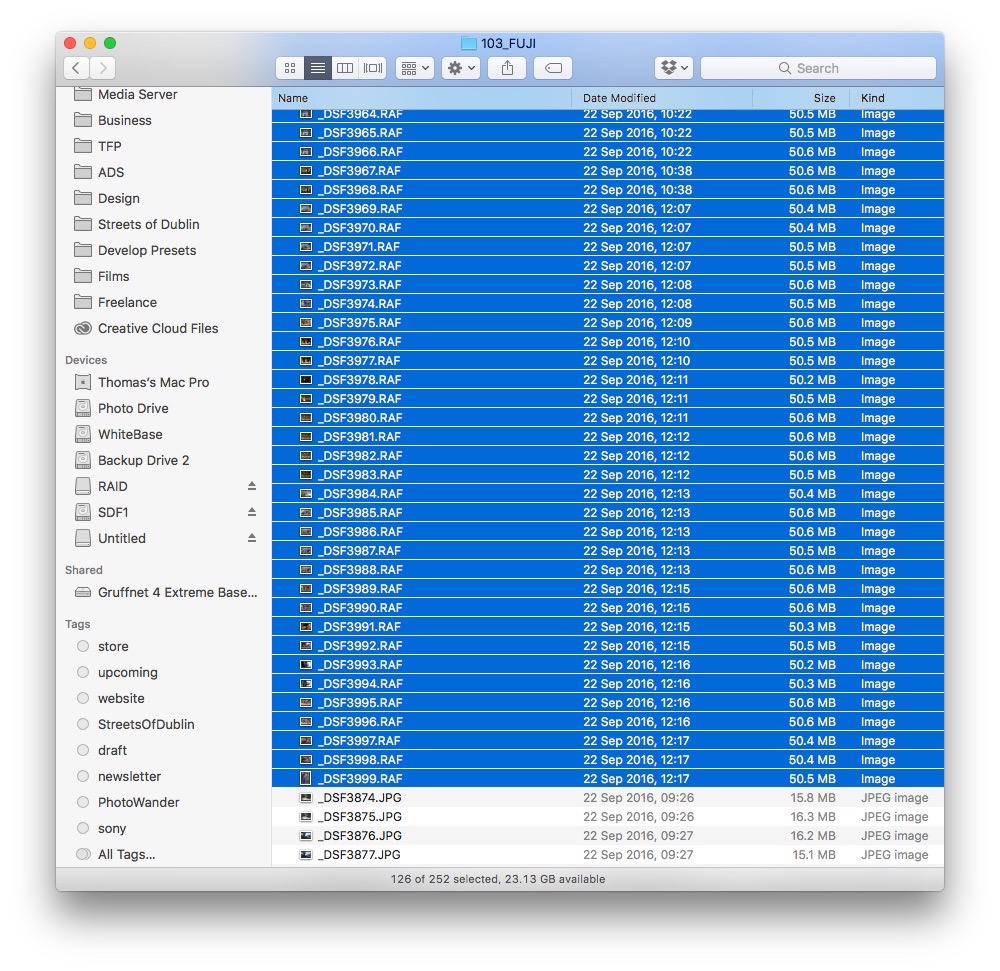
Make sure that you’ve scrolled to the top of the list them click on the first RAW file. Now scroll down the list of files until you come to the last RAW file (and the Jpegs begin). Shift click on this last RAW file to select all the RAW files in the list.
Step 5
With the RAW files selected in the finder, drag and drop them onto the Photos icon in the dock. Alternatively, if the Photos interface is open you can drag them onto the Photos icon in the Photos Library sidebar fit’s visible.
Step 6
Depending on where you drag the files, you will either get a screen asking you to import or not. If you drag them onto the Dock icon, a new section will appear in the Photos sidebar under the import section showing you the photos that you just selected ready to import. Click on import to begin importing them. If you dragged them to the Photos icon on the photos sidebar, they’ll start importing immediately.
That’s all there is to it really. You can find your imported images under the “Last Import” icon on the Photos sidebar. You can use this method to import both the Raw and Jpeg files separately if you was to have both as separate files rather than joined which is the default method.
Help Support the Blog
Buy from our affiliates
If you want to help support our blog, you can do so if you buy anything from our affiliate partners:
- Capture One Pro is available in both subscription and perpetual licences available, in versions for all cameras, Fuji specific , Sony specific or Nikon specific. In addition you can get 10% off the price of any Capture One product by using the following code: TFPHOTO
- Capture One Professional Style Kits from Capture One.
- Luminar AI is available from Skylum Software. Get a 10% discount using the following code: TFP10
- Nik Collection from DXO Labs
- DXO Photo Lab
- DXO Pure Raw
- My Amazon Photo Recommendations
- My Favourite Mac Utility Application: Clean My Mac X from MacPaw
- The VPN I use regularly - Nord VPN - Save on 2 year deal (valid at the time of posting)
If you buy through the above links, we get a small commission, which helps run this site.
Check out my Capture One Style Packs
If you’re looking for some Film Effect, or black and White style packs for Capture One, check out my Capture One styles on my Gum Road Store.
Buy me a coffee!
If you’d rather not use Patreon, but still want to say thanks or help, then you can feed my caffeine habit and buy me a coffee via PayPal with a one off donation to my PayPal tip jar.
Join our Facebook Group
If you want to discuss anything you’ve read here on my website, or saw on my youtube channel, or if you want to share images you’ve created using any of my techniques or presets, then I’ve started a new Facebook Group just for that.
Note that this post contains paid affiliate links. We get a small commission for purchases made through these links, which helps run this site.